
Mastering the Art: A Comprehensive Guide to Installing an Auto Spring Leveling Kit
Achieving the perfect balance and stance for your vehicle is a desire shared by many automotive enthusiasts. Whether you’re looking to enhance aesthetics, improve performance, or increase ground clearance, installing an auto spring leveling kit can provide the solution you seek. In this detailed guide, we will walk you through the step-by-step process of installing a spring leveling kit, empowering you to tackle this automotive upgrade with confidence and precision.
Understanding Auto Spring Leveling Kits
Before diving into the installation process, it’s essential to understand what an auto spring leveling kit entails. These kits typically consist of spacer blocks or coil spring spacers designed to raise the front or rear suspension of your vehicle, thereby leveling the ride height and correcting any sagging or uneven stance. By lifting the vehicle’s suspension, a leveling kit can accommodate larger tires, improve ground clearance, and enhance overall appearance and performance.
Pre-Installation Preparation
Before you begin the installation process, it’s crucial to gather the necessary tools and materials and prepare your vehicle for the task ahead. Here’s a checklist to ensure you’re ready to proceed:
- Leveling Kit Components: Ensure you have all the components included in the leveling kit, including spacer blocks, coil spring spacers, hardware, and installation instructions.
- Tools: Gather the tools needed for the installation, including a floor jack, jack stands, socket wrench set, torque wrench, pry bar, and penetrating lubricant.
- Safety Precautions: Always prioritize safety when working on your vehicle. Wear appropriate protective gear, such as gloves and safety glasses, and work in a well-ventilated area with ample lighting.
- Vehicle Inspection: Perform a visual inspection of your vehicle’s suspension components to identify any signs of wear or damage. (https://outdoorlogic.net/how-to-install-an-auto-spring-leveling-kit/) Address any issues before proceeding with the installation to ensure optimal performance and safety.
Step-by-Step Installation Process
Now that you’re prepared to begin the installation, let’s walk through the step-by-step process:
- Lift and Secure the Vehicle: Use a floor jack to lift the front or rear of the vehicle, depending on the location of the leveling kit installation. Place jack stands under the frame rails to support the vehicle securely and prevent it from shifting during the installation process.
- Remove Wheels: Remove the wheels on the side of the vehicle where you’ll be installing the leveling kit. Use a lug wrench to loosen the lug nuts before lifting the vehicle, then remove the wheels completely and set them aside in a safe location.
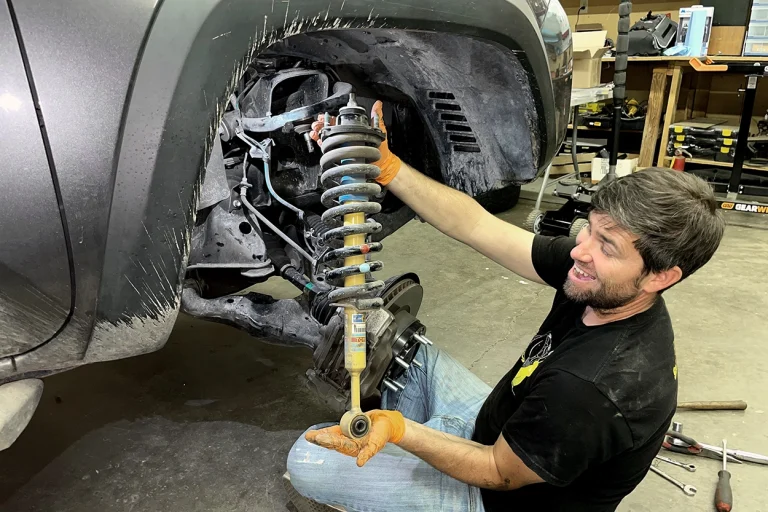
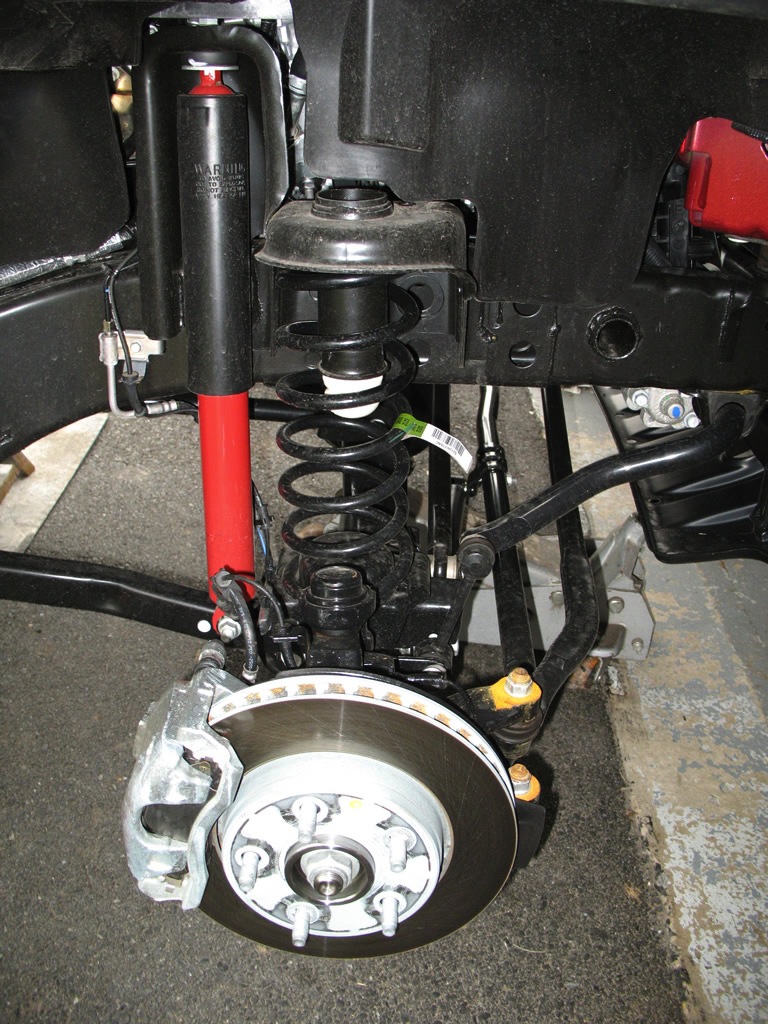
- Access Suspension Components: Locate the suspension components that will be modified or augmented by the leveling kit. This may include coil springs, shock absorbers, or struts, depending on your vehicle’s suspension design.
- Install Spacer Blocks or Coil Spring Spacers: Depending on the type of leveling kit you’re using, install spacer blocks above the coil springs or coil spring spacers between the coils themselves. Follow the manufacturer’s instructions for proper placement and orientation of the spacers.
- Reinstall Wheels: Once the leveling kit components are securely in place, reinstall the wheels onto the vehicle’s hub assembly. Tighten the lug nuts by hand in a crisscross pattern to ensure even torque distribution.
- Lower the Vehicle: Carefully lower the vehicle back onto the ground using the floor jack. Remove the jack stands and lower the vehicle slowly to prevent any sudden shifts or instability.
- Torque Lug Nuts: Use a torque wrench to tighten the lug nuts to the manufacturer’s specified torque settings. Refer to your vehicle’s owner’s manual for the recommended torque specifications.
- Test Drive and Alignment: Take your vehicle for a test drive to assess the changes in ride height and handling characteristics. If necessary, schedule a professional alignment to ensure optimal tire wear and vehicle stability.
Post-Installation Considerations
After completing the installation, there are a few additional considerations to keep in mind:
- Monitoring Ride Quality: Pay attention to any changes in ride quality, handling, or steering responsiveness after installing the leveling kit. Address any issues promptly to ensure optimal performance and safety.
- Regular Maintenance: Periodically inspect the leveling kit components and suspension system for signs of wear or damage. Lubricate moving parts as needed and replace any worn or damaged components to maintain peak performance.
- Legal Compliance: Be aware of any local regulations or laws regarding vehicle modifications, including suspension lifts and leveling kits. Ensure that your vehicle remains compliant with applicable regulations to avoid any legal issues.
Achieving the Perfect Balance
In conclusion, installing an auto spring leveling kit is a rewarding automotive upgrade that can enhance the appearance, performance, and versatility of your vehicle. By following the step-by-step installation process outlined in this guide and adhering to safety precautions, you can tackle this project with confidence and precision. Whether you’re seeking to accommodate larger tires, improve ground clearance, or achieve a more aggressive stance, a leveling kit provides the solution you need to achieve the perfect balance for your vehicle. With careful planning, preparation, and execution, you’ll be well on your way to enjoying a smoother, more capable ride on and off the road.